Selling an iPhone isn’t just about wiping the screen clean and handing it over. If you’re planning to sell your phone, the most important part of the process happens before the phone ever leaves your hands. Clearing your iPhone properly protects your personal data, avoids delays, and helps you get the full value when you sell iPhones in Australia.
This guide walks you through the process step by step, in plain language, so you can sell with confidence and peace of mind.
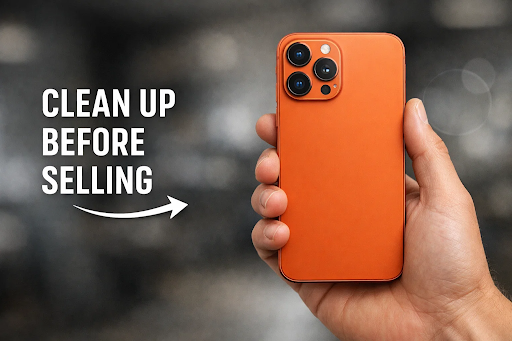
Why Clearing Your iPhone Properly Matters Before You Sell It
Your iPhone holds more personal information than you might realise. Photos, messages, banking apps, saved passwords, health data, and access to your Apple ID are all stored on the device.
If you don’t clear your phone correctly:
- Personal data can be exposed to the next user
- iCloud Activation Lock can prevent the buyer from using the phone
- Buyers may lose trust or cancel the sale altogether
- Your resale value can drop because the phone isn’t ready to use
Professional buyers and platforms, including Mobile Guru, check these things closely. A properly cleared iPhone shows care, responsibility, and makes the selling process smoother for everyone involved.
What Happens If You Don’t Clear Your iPhone Before Selling?
Skipping steps or rushing the process can cause real problems, not just small inconveniences.
Common outcomes include:
- The buyer can’t activate the phone due to Activation Lock
- Payment is delayed or cancelled until the issue is fixed
- Your Apple ID remains linked, risking data access
- The phone is downgraded in value or rejected entirely
In short, failing to clear your iPhone properly can turn a simple sale into a stressful back-and-forth.
Things to Do Before You Start Clearing Your iPhone
Before you begin, take a few minutes to prepare. This avoids mistakes later.
Preparation checklist:
- Make sure you remember your Apple ID email and password
- Charge your iPhone to at least 50%
- Connect to a stable Wi-Fi network
- Remove your SIM card and any accessories (case, screen protector if needed)
Once these basics are covered, you’re ready to clear the device safely.
Step-by-Step: How to Clear Your iPhone Safely
Back up your data first
Before you erase anything, back up what matters.
You can back up your iPhone by:
- Using iCloud (Settings → Your Name → iCloud → iCloud Backup → Back Up Now), or
- Connecting your iPhone to a computer and backing up through Finder or iTunes
This ensures photos, contacts, and apps aren’t lost forever.
Sign out of iCloud and Apple ID
This step is critical if you plan to Sell Your Phone.
Go to:
Settings → Your Name → Sign Out
Enter your Apple ID password when prompted. Signing out removes your personal connection to the device and prevents Activation Lock issues.
Turn off Find My iPhone
Turning off Find My iPhone is essential. Even a factory reset won’t fully release the phone if this remains active.
When you sign out of iCloud, Find My iPhone is automatically disabled. Double-check to be sure.
Factory reset your iPhone properly
Now you can erase the device.
Steps:
- Go to Settings → General → Transfer or Reset iPhone
- Tap Erase All Content and Settings
- Confirm when prompted
Your iPhone will restart and display the “Hello” setup screen once complete.
Double-Check Your iPhone Is Ready to Sell
Before handing it over or posting it, run through this final check.
Quick checklist:
- Activation Lock is removed
- No photos, messages, or apps remain
- Phone starts at the setup screen
- SIM card has been removed
- Accessories are packed separately
If all boxes are ticked, your phone is ready to sell.
Where Most People Go Wrong When Clearing an iPhone
Even careful sellers make mistakes. These are the most common ones to avoid:
- Resetting the phone without signing out of iCloud
- Forgetting Apple ID details mid-process
- Skipping backups and losing important data
- Rushing because the buyer is waiting
Taking an extra 10 minutes upfront can save days of frustration later.
Clearing Your iPhone Before Selling Online
Selling online requires extra care because the buyer can’t help you fix issues in person. Most online buyers inspect devices carefully and won’t proceed if something isn’t right.
Structured services like the Mobile Guru phone trade-in service exist to make this process clearer, with defined checks that ensure devices are properly cleared before finalising a sale. This level of structure helps protect both sellers and buyers and sets clear expectations around data security.
What to Do After Your iPhone Is Cleared
Once your phone is wiped and ready, the focus shifts to safe handling and choosing the right selling path.
Next steps include:
- Packing the phone securely to prevent damage
- Choosing a reliable buyer with clear inspection standards
- Understanding how condition affects final payment
Phones that are correctly cleared can then be assessed, tested, and prepared for resale as Mobile Guru refurbished phones, which also means sellers can move on knowing the same platform that helps them sell their device is preparing quality refurbished phones for the next buyer.
Final Thoughts: Clearing Your iPhone the Right Way Before You Sell
Clearing your iPhone properly isn’t just a technical step, it’s a trust step. It protects your personal information, avoids payment issues, and helps you get fair value when you sell phones in Australia.
By following these steps calmly and carefully, you stay in control of the process from start to finish. That focus on data safety and transparency is why many Australians feel comfortable dealing with established platforms like Mobile Guru , where proper clearing isn’t optional, it’s expected.
Taking the time to do it right ensures a smoother sale, better outcomes, and peace of mind long after the phone is gone.

Enhance Your BMW G30 with an Android Screen Upgrade

Why Charlotte is a Growing Market for Rolls-Royce Luxury Vehicles
How Do I Clear My iPhone Before Selling?