Lighting can make or break your video content. Even the most compelling vlogger loses viewers when their face disappears into shadows or gets washed out by harsh, unflattering light. The frustrating truth is that most creators own a ring light but never move beyond its default settings, leaving a powerful tool operating at a fraction of its potential. The result? Flat, amateur-looking footage that fails to capture attention in an increasingly competitive landscape.
The good news is that learning to optimize your ring light’s adjustable brightness and color temperature transforms your production quality without requiring expensive upgrades or complex equipment. These two controls alone determine whether your skin looks natural or ghostly, whether your background complements your subject, and whether viewers perceive your content as professional or hastily produced. For vloggers who shoot in multiple locations—cafés, hotel rooms, outdoor spaces—mastering these settings on a portable ring light becomes even more critical. This guide walks you through everything you need to know, from foundational concepts to real-time adjustment techniques that adapt to any environment you encounter.
Understanding Ring Light Basics for Vloggers
A ring light is more than just a circle of LEDs—it’s a purpose-built tool designed to solve the most common lighting challenges content creators face. Before you can optimize brightness and color temperature effectively, you need to understand what makes this device unique and why it has become indispensable in the vlogging world. The circular design isn’t merely aesthetic; it serves a functional purpose that directly impacts how your audience perceives you on screen. Once you grasp these fundamentals, every adjustment you make becomes intentional rather than guesswork.
What is a Ring Light and How Does It Work?
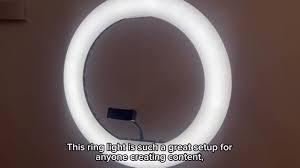
A ring light consists of a circular array of LED bulbs arranged in a hoop shape, typically ranging from six to eighteen inches in diameter. Your camera or phone mounts at the center of this ring, which creates something remarkable: light wraps evenly around your face from all directions simultaneously. This design eliminates the harsh directional shadows that plague single-point light sources. The circular arrangement also produces a distinctive catchlight—that appealing ring-shaped reflection in your eyes that signals high production value. Most modern ring lights use LED technology that diffuses light naturally across the ring’s surface, softening the output without requiring additional modifiers. This built-in diffusion means you get flattering, even illumination straight out of the box, with controls for brightness and color temperature giving you precise command over the final look.
Key Benefits of Using a Ring Light for Video Content
For vloggers specifically, ring lights deliver professional-grade results with minimal setup complexity. The even illumination smooths skin texture and reduces the appearance of blemishes, giving you a polished look without heavy post-production editing. Unlike softboxes or panel lights that require careful positioning and multiple units, a single ring light provides balanced fill from one compact source. This simplicity makes it ideal for creators who film frequently and can’t afford lengthy setup times. The versatility extends to virtually any content type—beauty tutorials benefit from shadow-free close-ups, talking-head videos gain depth and dimension, and product reviews get consistent, repeatable lighting. For mobile vloggers, the lightweight form factor and integrated phone mounts mean professional lighting travels wherever your content takes you.
Mastering Adjustable Brightness for Optimal Lighting
Brightness is the first variable most creators reach for, yet few understand how to set it with intention. The adjustable brightness on your ring light isn’t just a dimmer switch—it’s your primary tool for matching your light output to the environment you’re filming in. Get it wrong, and you’ll either blow out your highlights, leaving your face looking like a featureless white oval, or underexpose your shot so viewers strain to see your expressions. The key is learning to read your surroundings before you ever touch the dial, then making informed adjustments that balance your ring light’s output against whatever ambient light already exists in the space.
How to Assess and Set the Right Brightness Level
Start by turning off your ring light and observing the natural light in your filming location. Is the room dim with closed curtains, or is afternoon sunlight streaming through a window? This baseline tells you how much work your ring light needs to do. Next, power on the light at roughly fifty percent brightness and check your camera’s exposure preview. On most phones and cameras, you can see a live histogram or simply watch for clipped highlights—areas that appear pure white with no detail. If your face looks overexposed, dial the brightness down in small increments. If shadows still dominate your under-eye area or jawline, increase gradually until those shadows soften without creating glare. A practical test is recording a five-second clip at your chosen setting and reviewing it on your phone screen at full brightness. What looks acceptable in your camera’s viewfinder sometimes reveals problems on playback, so this quick check saves you from discovering issues during editing.
Brightness Adjustments for Different Vlogging Scenes
Different content scenarios demand distinctly different brightness approaches. For indoor tutorials filmed at a desk, moderate brightness between forty and sixty percent typically works well because you’re in a controlled environment with predictable ambient light. Interview-style setups where you’re slightly farther from the ring light may require bumping up to seventy or eighty percent to maintain even coverage across your face. Low-light situations—filming in the evening, in a dimly lit café, or during a hotel room vlog—call for higher output, but resist the urge to max out at one hundred percent. Full brightness at close range creates an unnaturally flat look and can cause eye fatigue during longer shoots. Instead, increase to around seventy-five percent and move the light slightly closer to compensate. For outdoor vlogging where you’re competing with sunlight, your portable ring light serves more as a fill light than a key light. Set it to a lower brightness and use it to soften shadows cast by overhead sun rather than trying to overpower natural daylight, which is a battle no ring light can win.
Fine-Tuning Color Temperature for Perfect Ambiance
While brightness controls how much light hits your subject, color temperature determines the character of that light—whether it feels warm and inviting or cool and clinical. This single setting profoundly influences how viewers emotionally respond to your content before they consciously register why. Color temperature is measured in Kelvin (K), and most ring lights offer a range between approximately 2700K and 6500K. Understanding where to land on this spectrum for each shooting scenario eliminates the frustrating color casts that make your skin look jaundiced under warm light or corpse-like under cool light. More importantly, intentional color temperature choices create visual consistency across your content, building a recognizable aesthetic that strengthens your brand.
Understanding Color Temperature Ranges and Effects
The Kelvin scale runs counterintuitively—lower numbers produce warmer, orange-toned light while higher numbers create cooler, blue-toned illumination. At the warm end around 2700K to 3200K, your ring light mimics candlelight or golden hour sunlight, creating an intimate, cozy atmosphere perfect for lifestyle vlogs, evening routines, or storytelling content where you want viewers to feel relaxed. The neutral midrange between 4000K and 4500K closely resembles natural daylight on an overcast day, rendering skin tones most accurately without adding warmth or coolness. This is your safest default for general vlogging because it introduces minimal color bias. At the cool end from 5500K to 6500K, light takes on a crisp, energetic quality similar to bright midday sun. This range suits professional or tech-focused content where clarity and alertness are the desired impressions. Skin tones under cool light appear more defined but can look unflattering if pushed too far, so approach the upper extremes cautiously.
Practical Tips for Matching Color Temperature to Your Environment
The most common mistake vloggers make is ignoring the existing light sources in their environment. When your ring light outputs cool 6000K light but your room is filled with warm 2700K bulbs from table lamps, the resulting footage shows an unpleasant mix of blue and orange tones competing across your frame. The solution is straightforward: match your ring light’s color temperature to the dominant ambient light source. If you’re filming in a room with warm overhead lighting, dial your ring light down to approximately 3000K to 3500K so both sources blend seamlessly. Filming near a window during daytime? Set your color temperature between 5000K and 5500K to harmonize with incoming daylight. When you’re in a location with mixed lighting—say fluorescent overhead tubes and warm wall sconces—prioritize matching whichever source is closest to you and most visible in frame. You can also use your camera’s white balance setting in conjunction with your ring light adjustment for even tighter control. Set your camera to manual white balance, match it to your ring light’s Kelvin value, and suddenly every light source that doesn’t match will appear obviously wrong, making it easy to decide which ambient lights to turn off or reposition away from.
Choosing the Best Portable Ring Light for Vlogging
Optimizing brightness and color temperature only matters if your ring light can keep up with your creative demands. For vloggers who film across multiple locations—coffee shops, co-working spaces, outdoor markets, or while traveling—a portable ring light becomes one of the most essential vlogging accessories in your kit. The challenge is finding a model that balances compactness with genuine functionality, because a light that’s easy to carry but lacks adjustable brightness or sufficient color temperature range defeats the purpose of everything discussed so far. Choosing wisely means evaluating a handful of critical features before committing.
Essential Features to Look for in a Portable Ring Light
Prioritize a ring light that offers stepless or finely incremented adjustable brightness alongside a full color temperature range from warm to cool. A limited range restricts your ability to match environments, which is the foundation of professional-looking footage. Battery life matters enormously for on-location shoots—look for rechargeable models that deliver at least sixty to ninety minutes of continuous use at moderate brightness. Mounting versatility is another deciding factor; your portable ring light should attach securely to a tripod, clamp onto a laptop, or sit on a tabletop stand depending on the situation. Brands like Ulanzi have built their reputation around this kind of versatile, creator-focused design, offering compact lighting solutions with the full range of brightness and color temperature controls that on-the-go vloggers need. Compatibility with your phone or camera mount ensures you can shoot through the ring’s center for that signature even illumination. Build quality shouldn’t be overlooked either, since a light that travels frequently needs to withstand being tossed into bags and jostled during transit without losing alignment or developing flickering LEDs.
Top Portable Ring Light Recommendations for On-the-Go Creators
Clip-on mini ring lights work exceptionally well for smartphone vloggers who need something pocket-sized for spontaneous filming. These small units sacrifice raw power but excel in close-range scenarios like selfie-style vlogs and quick social media updates. Mid-size ring lights in the eight to ten inch range hit a sweet spot for creators who want noticeably better lighting without carrying bulky equipment—they fold flat, fit into backpacks, and produce enough output for most indoor environments. Full-size portable options with collapsible tripod stands suit creators who primarily film at fixed locations but need the flexibility to relocate easily. Whichever category fits your workflow, confirm that the model supports the full brightness and color temperature adjustments you need, because portability means nothing if the light can’t adapt to the diverse conditions you’ll encounter on the go.
Step-by-Step Guide to Optimizing Your Ring Light Setup
Knowing the theory behind brightness and color temperature is valuable, but translating that knowledge into a repeatable, efficient workflow is what separates polished content from inconsistent results. This section brings everything together into a practical process you can follow every time you set up to film, whether you’re in your home studio or a location you’ve never shot in before. Think of it as your pre-shoot checklist—a sequence of deliberate steps that eliminates guesswork and gets you camera-ready in minutes rather than wasting half your creative energy fiddling with settings.
Initial Setup and Calibration Process
Begin by positioning your ring light at eye level, directly in front of where you’ll sit or stand, with your camera or phone mounted through the center of the ring. Distance matters more than most creators realize—placing the light roughly two to three feet from your face provides the most flattering balance of coverage and intensity. Once positioned, power on the ring light and set both brightness and color temperature to their neutral midpoints as your starting baseline. Now turn off any unnecessary ambient light sources that could introduce competing color casts, leaving only the light you actually want in your frame. Record a ten-second test clip, review it on your device, and check three things: Are highlights on your forehead or nose blown out? Do shadows under your chin look harsh? Does your skin tone appear natural? Adjust brightness first in small increments to fix exposure issues, then shift color temperature to correct any warmth or coolness that feels unnatural. This calibration process takes under two minutes once you’ve practiced it a few times and establishes a reliable foundation for every shoot.
Dynamic Adjustment Techniques for Various Shooting Conditions
Real-world vlogging rarely offers static conditions. Clouds roll over the sun mid-sentence, café lights dim as evening approaches, and hotel room lamps cast unpredictable color shifts across your frame. The key to handling these changes is monitoring your footage actively rather than setting your ring light once and forgetting it. If you notice your image gradually warming as sunset light enters a window, nudge your color temperature cooler by a few hundred Kelvin to compensate. When ambient light drops and your face starts losing definition, increase your adjustable brightness by ten to fifteen percent rather than making dramatic jumps that create jarring visual shifts between clips. For vloggers who move between locations within a single video, develop a quick-change routine: pause recording, reassess the dominant light source in your new spot, match your ring light’s color temperature to it, adjust brightness to fill without overpowering, and resume. This takes thirty seconds and prevents the disorienting look of mismatched lighting between scenes that screams amateur editing.
Maintenance and Advanced Optimization Tips
Keeping your ring light performing at its best requires minimal but consistent care. Wipe the LED surface with a soft microfiber cloth weekly to remove dust that gradually reduces light output and creates uneven diffusion. Check your power connections and battery health monthly, since degraded batteries deliver inconsistent brightness that fluctuates during recording. For creators ready to push beyond the basics, experiment with off-center positioning—mounting the ring light slightly above and to one side introduces subtle, cinematic shadows that add depth while still benefiting from its soft, wrapped quality. Layering a second small light behind you as a hair or rim light creates separation from your background, elevating your production value dramatically. You can also use colored gels or your ring light’s warmest setting creatively for mood-driven content like evening routines or ambient vlogs where technical accuracy matters less than emotional tone. The more deliberately you experiment, the more instinctive these adjustments become, eventually allowing you to optimize your setup almost unconsciously.
Transform Your Vlog Quality With Intentional Lighting
Mastering your ring light’s adjustable brightness and color temperature isn’t about technical perfection—it’s about giving your audience a reason to keep watching. When your lighting looks intentional, viewers trust your content more, engage longer, and come back consistently. The core principles are straightforward: assess your ambient environment before touching any controls, set brightness to complement rather than overpower existing light, and match your color temperature to the dominant source in your space to avoid distracting color casts. These fundamentals apply whether you’re filming at a desk or adapting on the fly with a portable ring light in an unfamiliar location.
The real advantage of these techniques is that they scale with your ambitions. As you grow more comfortable with the basics, you’ll naturally begin experimenting—shifting color temperature for creative mood, positioning your light off-center for cinematic depth, or layering additional sources for separation and dimension. Every shoot becomes an opportunity to refine your instincts. So before your next recording session, run through the calibration process outlined above, pay attention to how each small adjustment changes your image, and commit to never settling for default settings again. Your viewers will notice the difference immediately, even if they can’t articulate exactly why your content suddenly looks so much better.

Fullimedia Com: Elevate Your Digital Media Strategy

Edunexas: Revolutionizing Online Education

NewsApollo: Your Gateway to Reliable News