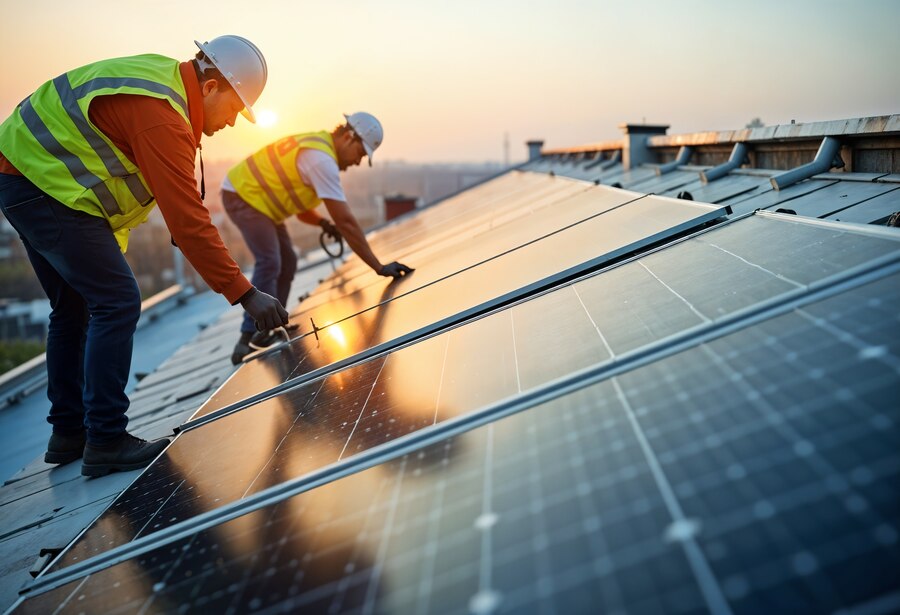
As solar energy becomes a mainstream choice for residential energy solutions, homeowners across the country are looking to reduce utility bills and minimize environmental impact. But while the benefits of installing solar panels are widely known, a crucial step often overlooked is preparing the roof itself. Your roof is the literal foundation for your solar investment—and its readiness will determine the longevity, safety, and efficiency of your solar power system.
Installing solar panels isn’t as simple as placing them on any available rooftop. The roof must be structurally sound, appropriately angled, free from obstructions, and constructed of materials that complement the system’s weight and lifespan. Without proper preparation, even the most advanced solar panels will underperform or face premature failure. This guide walks through the key steps and considerations to ensure your roof is solar-ready.
Why Roof Preparation Matters
The lifespan of most solar panel systems is between 25 to 30 years. If the roofing material beneath the system isn’t expected to last just as long, the cost and hassle of removing and reinstalling the panels for roof repairs can be significant. Likewise, any structural weakness or poor water drainage setup will become more complicated once panels are mounted.
Proper roof preparation helps to:
- Extend the life of your entire roofing system.
- Avoid costly disassembly for repairs.
- Enhance the energy efficiency and output of the solar panels.
- Maintain safety and code compliance.
Step 1: Evaluate Roof Age and Condition
Start by determining how old your current roof is. Asphalt shingles generally last 20 to 25 years, while metal roofing can exceed 50 years. If your roof is already nearing the end of its life, it’s advisable to replace or re-roof before installing solar panels.
Signs your roof may need replacement before solar installation:
- Curling, cracking, or missing shingles.
- Visible water damage or leaks in the attic.
- Sagging rooflines or soft decking.
- Accumulated granule loss from shingles.
AG Exterior Solutions recommends homeowners consult a roofing specialist to inspect the existing surface and underlying structure to verify whether it’s suitable for a long-term solar panel load.
Step 2: Understand Roof Material Compatibility
Some roofing materials are better suited for solar panel mounting than others. While solar systems can technically be installed on most types of roofs, ease of installation, structural compatibility, and weather resilience vary widely.
Best Roofing Materials for Solar Panels:
- Asphalt Shingles: The most common and compatible surface for solar panel mounts.
- Metal Roofing (Standing Seam): Panels can often be attached without roof penetrations.
- Flat Roofs: Typically require mounting systems with tilted racks.
More Challenging Surfaces:
- Clay or Slate Tiles: Brittle materials can crack under installation pressure.
- Wood Shingles or Shakes: Not ideal due to fire codes and fragility.
If your roof falls into the “challenging” category, additional reinforcements or mounting alternatives may be necessary. A professional evaluation can help determine the best approach.
Step 3: Evaluate Roof Slope and Orientation
The orientation and pitch of your roof affect how efficiently solar panels convert sunlight into usable energy. In North America, south-facing roofs provide optimal sun exposure.
Ideal specifications:
- Orientation: South-facing with minimal shading.
- Pitch (angle): Between 15° and 40° for maximum efficiency.
While east- or west-facing roofs can still support solar panels, they may require more surface area to meet energy goals. Shading from trees, chimneys, or nearby structures can significantly reduce output and should be minimized during planning.
Step 4: Assess Structural Load-Bearing Capacity
Solar panels and their mounting systems add weight to your roof. Most residential systems add between 2.5 to 4 pounds per square foot. For older homes, this additional load may exceed the roof’s original design.
A structural engineer or roofing contractor should:
- Assess rafter spacing and load-bearing limits.
- Identify any areas of sagging, water damage, or wood rot.
- Recommend reinforcements, if necessary, to support the solar array.
Skipping this step can lead to long-term safety issues, including roof collapse or mounting failure.
Step 5: Optimize Drainage and Flashing
Solar panels and their supports can create obstacles for water drainage. Poor drainage can cause pooling, shingle damage, or even leaks.
To ensure optimal water flow:
- Clean and inspect gutters and downspouts.
- Confirm that no obstructions exist where mounts will be installed.
- Install or update flashing around vents, chimneys, and other roof penetrations.
- Adjust panel positioning to allow water to flow freely off the roof.
Professionals such as AG Exterior Solutions often recommend pairing gutter system upgrades with solar preparation to prevent long-term drainage issues.
Step 6: Plan Around Vents and Protrusions
Solar panels need uninterrupted space for proper layout and exposure. Vents, chimneys, skylights, and HVAC units can obstruct ideal panel placement.
Strategies to address obstructions include:
- Relocating or minimizing rooftop vents where feasible.
- Designing panel layout to work around immovable features.
- Consulting roofing professionals for alternative routing of exhaust or plumbing vents.
Step 7: Secure Permits and Meet Code Requirements
Before installation begins, homeowners must ensure compliance with local building codes and zoning laws. Solar systems often require permits that involve roof inspections, structural load approvals, and adherence to fire safety setbacks.
Many regions also require:
- Wind and snow load calculations.
- Structural engineering reports.
- Solar-ready certifications for new homes.
Partnering with contractors familiar with local requirements simplifies the process and prevents permit delays.
Step 8: Choose the Right Mounting System
Mounting systems are what secure solar panels to your roof. Their design and quality directly influence your roof’s longevity and your solar system’s safety.
Common mounting options include:
- Rail-Based Systems: Provide secure support and flexibility.
- Rail-Less Systems: Offer sleek aesthetics and faster installation.
- Ballasted Mounts (for flat roofs): Use weight rather than penetrations for attachment.
Each system requires proper flashing and waterproofing at all penetration points. Workmanship matters—poor installation can lead to leaks, roof degradation, and compromised warranties.
Step 9: Consider Maintenance Access
Solar panels require minimal maintenance, but occasional cleaning or inspections are still necessary. Design the panel layout to allow room for access without walking on fragile parts of the roof.
Plan for:
- Safe access paths.
- Panel tilt angles that discourage debris buildup.
- Locations that avoid high-traffic roof zones.
Proper planning reduces the risk of damage during maintenance and improves long-term performance.
Step 10: Time Your Installation Wisely
Roof preparation and solar installation are ideally coordinated. If your roof needs replacement, re-roofing before or during solar installation avoids future costs.
Signs it’s time to replace your roof before going solar:
- Asphalt shingles over 15 years old.
- Visible signs of deterioration.
- Past problems with ice dams or leaks.
Doing both projects together ensures proper integration and longer-lasting results.
Conclusion: Build the Right Foundation for Solar Success
Investing in solar panels is a smart move, but only if the foundation beneath them is built to last. Roof preparation is not an optional detail—it’s a critical factor in ensuring energy savings, long-term durability, and return on investment.
By evaluating your roof’s age, material, pitch, drainage, and structural integrity, you can ensure it’s ready to support decades of clean energy. Homeowners who work with experienced professionals, such as AG Exterior Solutions, gain access to expert guidance on roofing upgrades, material compatibility, and design coordination that make solar installation smooth and secure.
When the sun shines on a properly prepared roof, the benefits are more than just electrical. It’s peace of mind, structural integrity, and an exterior built for performance.

Why Retail Software Testing is Critical for Effective E-commerce Development?

How Sales Teams Increased Productivity with Parallel Dialers

Curtain Dry Cleaning and Leather Sofa Cleaning – Reliable Care by Duo Nini


The Complete Guide to Growing on Twitch: Should You Buy Twitch Followers?

How Technology Is Changing Addiction Recovery in the Digital Age.

What to Expect During Your First NDIS Support Visit
Solve SMD Diodes Sourcing with Utsource's Bulk Options

555 Meaning: Spiritual, Biblical, Love & Prophetic Significance Explained