Introduction to Kato 381 Series Weathering
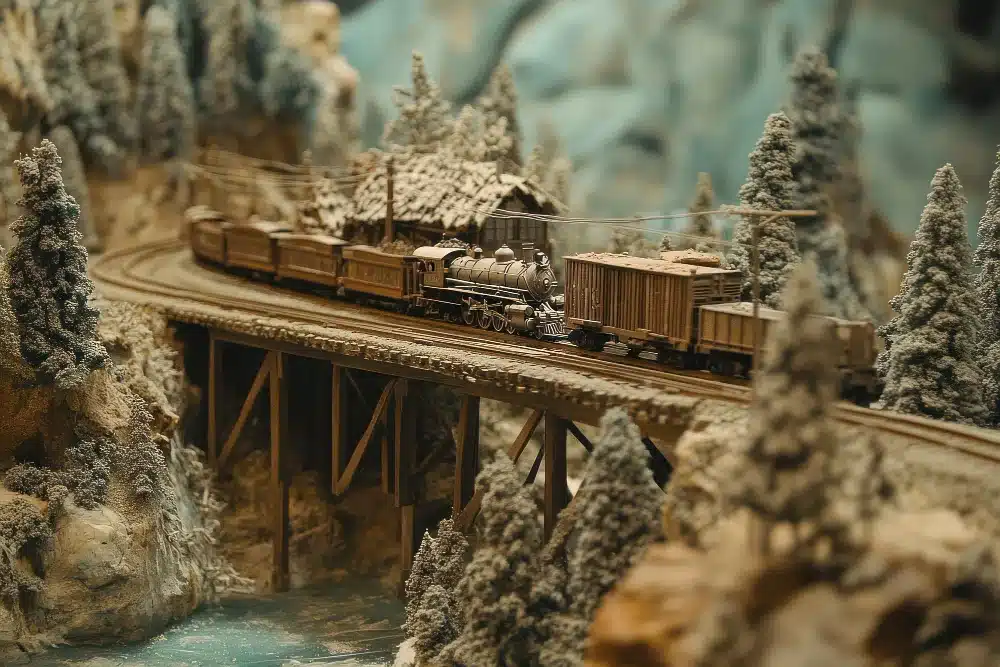
Model railroading is not just a hobby; it’s an art form that allows enthusiasts to recreate real-world trains and landscapes in miniature form. Among the most significant techniques in model railroading is weathering, which gives trains a realistic, worn look. The Kato 381 Series weathering technique, in particular, is a popular choice among hobbyists due to the model’s intricate details and high-quality design. Weathering the Kato 381 Series transforms the model from a pristine replica to one that looks like it’s been through years of service on real tracks.
Weathering is about more than just adding a layer of dirt or rust. It’s about replicating the effects of time, exposure to the elements, and wear from constant movement. In this article, we’ll cover everything you need to know about weathering your Kato 381 Series model. From essential tools to step-by-step techniques, we will ensure you can master Kato 381 Series weathering and elevate your model to new heights of realism.
Why Weathering Enhances Realism
Weathering is a technique used to simulate the effects of age, wear, and weathering that trains experience in real life. Whether you’re building a display piece or adding a model to your layout, weathering brings your Kato 381 Series model to life. A well-weathered model is not just visually more appealing but also evokes a sense of history, telling a story of travel, hard work, and the passage of time.
The key to successful weathering is achieving balance. You want your Kato 381 Series model to look realistic, not exaggerated. Whether you’re using subtle washes for fading paint or rust effects for weathered metal, each weathering step adds a new layer of authenticity that transports your model from the realm of “toy” to “real.”
Understanding the Kato 381 Series Model
Before diving into the world of Kato 381 Series weathering, it’s important to understand the model itself. The Kato 381 Series represents a high level of craftsmanship, known for its precision in design and operation. The model replicates an electric multiple unit (EMU) train, popular in Japan’s rail system, particularly in regions such as Kyushu and Shikoku.
With sleek, modern lines and intricate details, the Kato 381 Series is beloved by modelers for its authenticity. The train features fine details like window etchings, realistic passenger compartments, and visible underbody components that enhance its realism. These fine details make it an ideal candidate for weathering, as you can accentuate the small details and enhance the overall realism of the model.
Tools and Materials You’ll Need
To achieve the perfect Kato 381 Series weathering effect, having the right tools is crucial. Weathering techniques vary from person to person, but there are certain essentials you will need to get started.
Essential Tools:
- Airbrush – For applying smooth, even coats of paint and achieving precision with your weathering effects.
- Fine Paintbrushes – You’ll need a variety of brushes, including fine-tipped ones for detail work and broader ones for general application.
- Sponges – Ideal for dabbing paint and creating texture, especially when applying dirt or grime effects.
- Tweezers and Hobby Knives – To handle small parts and make precise cuts or adjustments.
Key Materials:
- Weathering Powders – These powders come in various colors and are essential for simulating rust, dirt, and grime.
- Acrylic Paints – Versatile and easy to use, acrylics are excellent for rust effects, dirt, and fading.
- Washes – Thinned-down paints that create subtle, layered effects.
- Varnishes and Clear Coats – After the weathering process, a good varnish will protect your work.
Preparing Your Kato 381 Series for Weathering
Before you begin the weathering process, it’s crucial to prepare your model. This ensures that the weathering materials will adhere properly and look realistic.
Cleaning and Priming:
The first step in preparing your Kato 381 Series weathering is to clean the model thoroughly. Any dust, oils, or fingerprints will prevent the weathering materials from sticking correctly. Use a soft brush to remove dust, or gently wipe the model with a microfiber cloth dampened with isopropyl alcohol.
If you want your weathering materials to adhere more effectively, consider priming the model with a light gray or tan primer. This is an optional step but will give you a smoother surface for applying weathering techniques.
Protecting Delicate Features:
If your model has delicate parts, such as windows or decals, use painter’s tape to mask them off. You can also apply a light layer of clear matte varnish to protect these features during the weathering process.
Beginner-Friendly Weathering Techniques
For beginners, it’s essential to start with simple techniques that yield great results without too much complexity.
Step 1: Apply Base Layers
Start by applying a thin wash of dark brown or gray acrylic paint over the surface of your Kato 381 Series model. This simulates dirt and grime that would naturally accumulate over time. Use a sponge or soft brush to apply the paint, focusing on the lower parts of the train, such as the undercarriage and wheels.
Step 2: Adding Rust and Fading Effects
Rust is an important part of any weathered model, and the Kato 381 Series is no exception. Use rust-colored weathering powders to apply to areas like doors, frames, and around rivets. For faded paint, apply a thin wash of light gray or tan to simulate sun exposure.
Advanced Weathering Methods
Once you’re comfortable with basic techniques, you can move on to more advanced weathering methods that involve layering and fine details.
Step 3: Airbrushing for Precision
For advanced weathering, airbrushing is a game-changer. Use your airbrush to apply precise layers of weathering effects, such as rust streaks or grime deposits. Airbrushing provides even coverage, making it ideal for replicating subtle, natural weathering.
Step 4: Layering Effects for Realism
Layering is key in advanced weathering. Start with base layers of grime and rust, then build on them by adding oil stains, faded paint, and dirt in different areas. The goal is to create depth and texture that mimics the natural wear and tear of a real train.
Replicating Real-World Environmental Effects
To take your Kato 381 Series weathering to the next level, consider replicating environmental factors that affect trains.
Urban Grime:
For urban settings, apply layers of dirt and grime to simulate the pollution and grime of city life. Use darker tones, such as soot or black weathering powder, especially around the wheels and undercarriage.
Coastal Corrosion:
If your model is set in a coastal environment, rust effects should be accentuated, simulating the corrosion caused by saltwater. Use a mix of rust-colored powders and washes for a weathered, corrosion-prone look.
Rural Dust and Dirt:
In rural settings, your Kato 381 Series should reflect the dust and dirt that accumulate in less-maintained areas. Use tan or light brown powders to simulate the buildup of dirt and dust, especially on high surfaces like the roof.
Common Mistakes and How to Avoid Them
Even experienced modelers can make mistakes. Here are some tips to avoid common weathering pitfalls:
- Over-Weathering: It’s easy to go overboard with weathering, but too much can make your model look unrealistic. Stick to subtle effects and build them up gradually.
- Inconsistent Application: Weathering should be consistent with the model’s environment and usage. Avoid applying effects where they wouldn’t naturally occur.
- Skipping Sealing: Always finish with a clear coat to protect your weathering. Without it, your effects may rub off over time.
Troubleshooting Weathering Errors
If your weathering isn’t turning out as expected, don’t worry—fixing mistakes is part of the learning process. Here’s how to address common issues:
- Too Much Paint: If your model has too much paint or weathering effects, you can lighten it by using a damp cloth or sponge to wipe away the excess.
- Uneven Coloring: To fix streaks or uneven areas, simply apply a light wash over the affected areas and blend it in.
- Lack of Depth: If your model lacks depth, add additional layers of weathering effects, such as subtle washes or powdered pigments, to bring out the fine details.
Case Studies: Inspiring Kato 381 Weathered Models
Let’s take a look at a few examples of Kato 381 Series models that have been successfully weathered. These models showcase various techniques and outcomes, offering inspiration and guidance for your own weathering projects.
Example 1: Urban Commuter Look
This Kato 381 Series model features rust effects on the edges, grime near the wheels, and a faded paint job to simulate years of use in a bustling city environment. The model uses airbrushing to create smooth transitions between rust and dirt.
Example 2: Coastal Train
A Kato 381 Series weathered to reflect coastal wear shows heavy rust on the undercarriage, with salt corrosion effects near the windows. This model uses multiple layers of rust powders and washes to simulate the harsh coastal environment.
Budget-Friendly Tips for Weathering
Weathering can get expensive, but it doesn’t have to be. Here are a few budget-friendly tips:
- Use Household Items: You don’t need expensive weathering powders. You can use materials like chalk, pastel powders, and even spices to create weathering effects.
- Reuse Tools: Brushes and sponges can be cleaned and reused, which helps you save on material costs.
- Buy in Bulk: If you plan on weathering multiple models, buying materials like paints and weathering powders in bulk will save you money in the long run.
Sealing and Preserving Your Weathered Model
Once your Kato 381 Series weathering is complete, it’s time to seal it. Use a matte or semi-gloss clear coat to protect your work from dust and damage. Spray the model lightly and evenly, ensuring that you cover all weathered areas without oversaturating them.
Displaying Your Weathered Kato 381 Series
Now that your Kato 381 Series model is weathered and sealed, it’s time to display it. A diorama or railway layout is the perfect setting for showcasing your hard work. Consider placing your model in a setting that complements the weathering effects. For example, an industrial setting might highlight the grime and rust, while a rural environment could emphasize dirt buildup.
Conclusion: Transforming Your Kato 381 Series into a Realistic Masterpiece
Weathering your Kato 381 Series is a rewarding process that adds depth and realism to your model. By using the right tools, techniques, and materials, you can turn your Kato 381 Series from a simple replica into a true work of art. Remember, practice makes perfect, so take your time and experiment with different effects to achieve the best results.
FAQs
- What is weathering in model railroading?
- Weathering is the process of adding realistic wear, rust, dirt, and fading to model trains to make them look more authentic.
- How can I weather my Kato 381 Series model?
- You can weather your model using various techniques such as dry brushing, washes, and airbrushing to add dirt, rust, and faded paint effects.
- What tools are required for weathering a Kato 381 Series?
- Essential tools include airbrushes, fine paintbrushes, weathering powders, acrylic paints, and clear coats for sealing.
- How do I prevent over-weathering on my Kato 381 Series?
- Apply weathering in layers and build up effects gradually. Focus on areas that naturally wear, like the undercarriage and wheels.
- How do I maintain and preserve the weathering on my Kato 381 Series?
- Keep your model in a dust-free environment and touch up the weathering as needed. Seal the model with a protective clear coat to preserve your work.

Why Choose High-Tech Electric Scooters Over Traditional Options for Commuting?
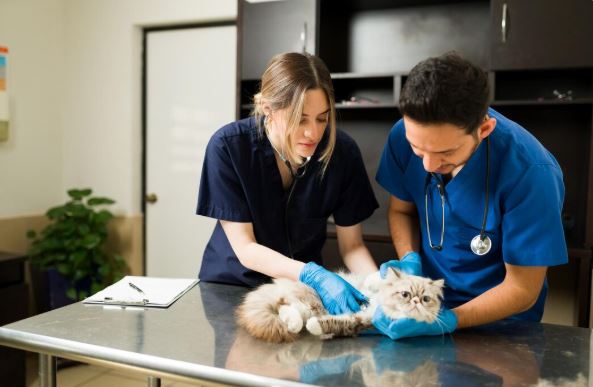
Recognizing Pet Emergencies: When to Seek Immediate Help from a Veterinarian in Maple Valley, WA
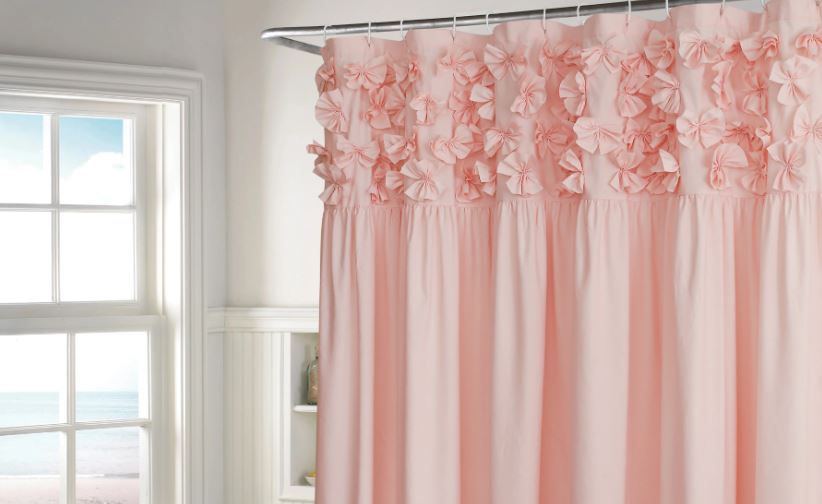
What Are the Benefits of a Ruffled Shower Curtain for Homeowners?